About Me

My photo
Welcome to Artsy Acorn! I love all sorts of art, photography, and making fun and unique items out of trinkets and found items. Enjoy creating and learning with me!

Sunday, March 30, 2014

Notable Notebooks

I really enjoy customizing things to make them my own, and that goes for this notebook made "a la Erin."


I found a hard cover notebook at the dollar store.  Then, I measured the notebook to make sure I trimmed the paper (Sweet Sorbet DSP) to the correct size.  I find that it helps to use my fingers to sort of form the paper to the shape of the notebook before adhering.  By creasing the paper a little around the bends of the notebook ahead of time will help you make sure everything aligns easier when you are adhering the paper to the notebook.

I used modge podge to glue the paper to the notebook cover.  I started on one side, making sure to press the paper evenly and firmly to make sure all bubbles are worked out.  Second, I add adhesive to the binding of the notebook, pressing to make sure the paper forms well to the crease and folds.  Finally (once the front and side have a chance to set up a little), modge podge is added to the back of the notebook and the same process of smoothing is done.

Let the notebook sit for a few hours so the glue has a chance to dry.  If needed, trim up any edges.  Embellishments can now be added easily!

For this notebook, I used Sweet Sorbet and Quatrefancy Specialty paper and a Blossom punch to cut out two flowers.  Then, I added two quarter inch scraps of gold foil paper behind the flowers.  Finally, a scrap of whisper white paper was used with the elegant butterfly punch and a dimensional was added to pop it up off the blossom.  Then, I smeared the butterfly with dazzling details and added a candy dot from the subtles collection in the center of the butterfly.


Wednesday, March 26, 2014

Chalk It Up!

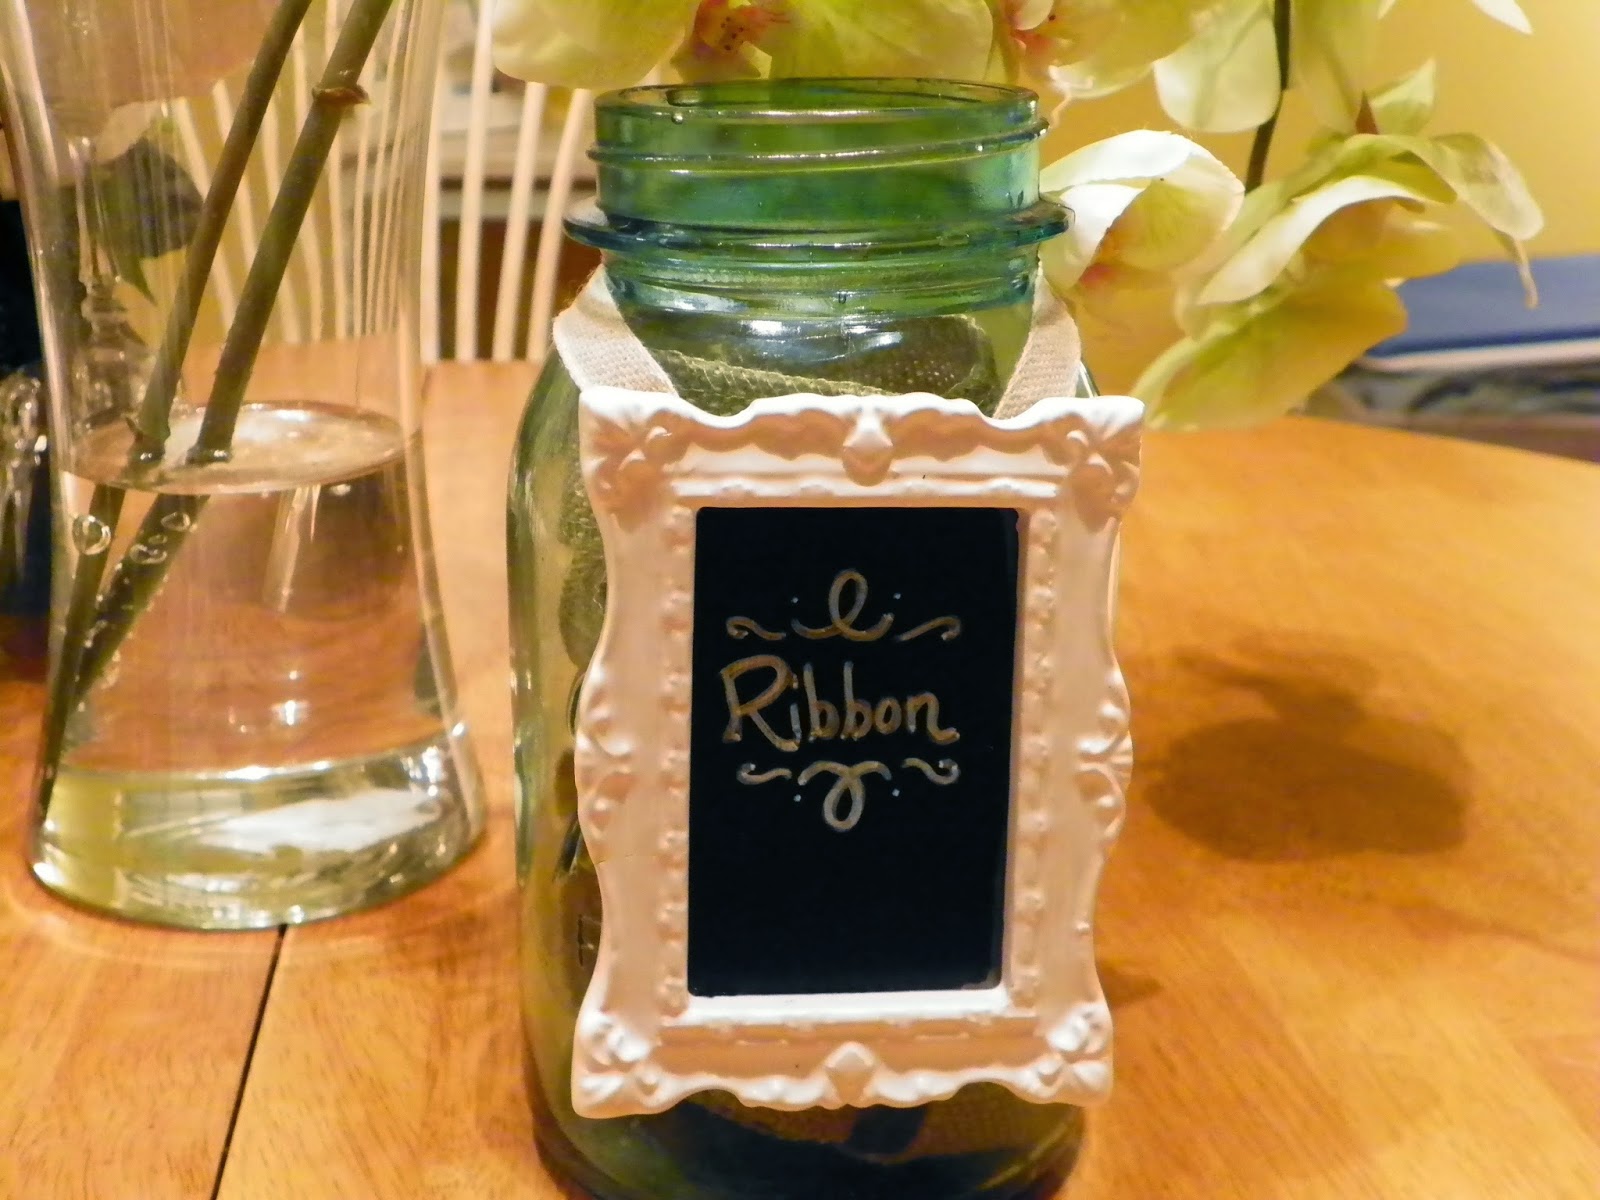
Have you played around with the chalk markers from Stampin' Up?  They are kind of addictive!  I made some labels for mason jars that hold ribbon scraps and markers on my workspace.


These great frames were a dollar at a local craft store.  I taped off the edges of the frame and painted the plastic cover (the frame had plastic instead of glass) with black chalkboard paint.  Once dried, I wrote the contents of the jar with my chalk marker in the center.  Some natural ribbon glued to the back of the frame makes this ready to go!


Here's another idea of something to do with a chalkboard frame.  


Monday, March 24, 2014

The Curious Case of a Grapevine Wreath

True Story:

I was at the gas station near my work this winter filling up my car when I notice a wreath made with of grapevine sitting on top of the trash container by the pump.  Poor wreath!  It was lovely and just calling out, "take me home with you!"  So, after pumping my gas and thinking about how interesting it was to literally take something from the garbage... at a gas station, it went in the backseat of my car!  This wreath was destined for bigger and better things.


My freebie wreath then met scraps of burlap ribbon I had left over from a wedding I helped with in the fall.  We made a "picture tree" where we tied the ribbon around a beautiful oak tree and clipped childhood pictures of the couple to the ribbon.


I recycled the ribbon and used white acrylic paint and a sponge dauber to add a some pizzaz to the ribbon.  That was tied around the wreath and used to make a bow.


To add final touches to the wreath, I added the flowers made in my previous post (check out my blog Fresh Flowers) to the side of the wreath.  A few additional touches were added as well!


First, I used quarters of Old Olive card stock to trim out grass-like blades.  A few of these were bundled and glued together before gluing to the wreath.  Next, I used the same card stock to make leaves, which were cut in an oval shape and then folded lengthwise to add dimension.  Finally, I took slivers of the Natural Composition Designer Series Paper and wrapped around a pencil to create curly spirals!


Right now, I have these fun wreath hanging in my kitchen, making everything spring-like and lovely!

Saturday, March 22, 2014

Fresh Flowers

Daffodils outside my house are blooming and everything is coming to life after a hard winter season.  Isn't it wonderful?  I love seeing what is popping up next.

That's why I've been playing around with making a flowers out of craft supplies that can stick around a little longer than their live counterparts.  Let's start craftin'!

I used a crepe filter paper to cut out flower shapes with the Floral Frames Framelits and Fun Flowers Bigz L die with my Big Shot.  After pulling these apart (because the cutting of the paper tends to smoosh all the edges together), I set to dying my newly cut flowers.

I chose Primrose Petals, Soft Sky, and Daffodil Delight colors for my flowers.  Covering my work surface with paper (I used butchers paper since I have a big roll), I set to spraying the flowers using a mixture of rubbing alcohol and about 10 drops of ink refill in a stampin' spritzer bottle.  Some of the flowers I sprayed twice to get a deeper color, while I was a bit more reserved with my spritzing on others.   Then, I transfered the flowers to clean paper to dry.  

The flowers will curl up a bit as the dry, so after they dried, I ironed the flowers on very low heat. They looked great when I was finished!


Now for assembly.  I pulled out my handy dandy silicone mat and glue gun to create the flowers.  I started by laying out one of the flower pieces on the mat and then added a dab of hot glue to the center. Then, I laid another piece on top, making sure the petal ends were moved over to the gaps in the previous flower's petals.  Stack as many as you wish for your flower (most of mine are about 5 or so petals together).


Now we will employ what I call the Squishing Technique (fancy, huh?).  I picked up the flower and separated the first 3 or so petals from the bottom three.  Then, I pulled them together, essentially squishing the top petals towards each other.  The result is a flower that has a fluffy and life like effect while keeping the few bottom petals stable for a base to your flower.


After squishing all of your flowers, we need to make a center for each.  Yay for the wonderful Sale-a-bration Sweet Sorbet accessory pack and the great twine that came with it.  That made great centers!  

I cut a length of the Summer Starfruit twine and doubled it over, continuing to do so until I had a little stack of twine.  


Then, I cut my stack of twine in half and stuck one end in a pool of hot glue on my silicone mat.  

After this dried and I made sure all the ends were nice and stuck in the glue (basically, I gave it a tug to make sure everything was glued in) I trimmed off the ends with my scissors.  Then, I started to untwist the twine so it would fray.  The result was a convinced little center to each of my flowers!


For the final step, I hot glued each flower center to the middle of my flowers.

Want to see what I made with all my flowers?  Stay tuned for my next blog post!


Monday, March 17, 2014

Feeling Lucky!

Happy Saint Patrick's Day!  I also enjoyed sharing a few projects with my colleagues today in this month's Craft and Camaraderie.

We started with making Shamrock pins (so no one would get pinched!)


These were easy to make!  First, I found a template for a shamrock online and copied it three times into a Word document.  Then, I adjusted two of the pictures to be smaller, so I ended up with three different sizes total (think Papa shamrock, Mama shamrock, and baby shamrock!)


I printed out my page and traced each shamrock on the white cardboard piece that comes as the backing to a set of Designer Series paper.  This made a great and sturdy pattern that is easily traceable using a piece that normally would have been thrown away!

I collected several shades of green card stock and green patterned paper (the DSP shown above came from a Christmas patterned set from a year or so ago).  One I traced out my pattern and cut each shamrock out, I adhered them together and fluffed the leaves.  Some dazzling details was smeared on my card stock piece (Old Olive cardstock) for some extra oomph.  A pin back and a little seam binding ribbon glued on the back finished this cute little pin!


We also made bookmarks using scraps I had left over from other projects.  The strips of Designer Series Paper were cut to 4 1/2 by 1 1/2 inches and scored at 3 inches and then the corners of the piece were rounded with a corner rounder.  Two pieces of magnetic strip were pieced on the back of the scored flap and the main piece to allow your bookmark to fold over your book page.


Before finishing up, we used a 1 3/4", 1 1/4" and 7/8" scallop punch to decorate the long end of the bookmark.  Here, we used card stock in coordinating colors ('12-'14 in color collection) and the "A Round Array" stamp set.  Finally, we used a little dazzling details since we already had it out for the shamrocks (and let's face it- what isn't better with a little dazzling details glitter on it, right?) Enjoy!


Tuesday, March 11, 2014

Creative with Canvas

I've been on a mission to find a way to decorate my guest bathroom.  Here is my shower curtain:


I was looking for a way to compliment the colors of the guest room as well have a little fun with it too!  When I first saw the flower details, I immediately thought of the Regarding Dahlias stamp set as knew I wanted to include those in my artwork!  

I started by recycling two canvases I had from my previous bathroom and painted over them with a khaki color acrylic paint.  Once dried, I drew out some swirls lightly with a pencil, then took the end of a paint brush and dipped into paint to create small circles.  


After finishing the canvases, I took a green sharpie and drew two sayings out on Very Vanilla 8 1/2 x 11 card stock and backed it with ripped Chocolate Chip Core'dinations cardstock.  Finally, I added a border of burlap ribbon!


Saturday, March 8, 2014

Decorative Details

I found this cute wooden tray at Goodwill the other week and couldn't wait to transform it.  Etcetera Designer Series Paper can do just that!  I used Antique Modge Podge to adhere all my pieces on the tray.  This specialty type of modge podge dries with a like antique finish, leaving the tray looking beautiful and vintage.

I love each aspect of the paper, and wanted to make sure I included as much as possible (plus, it made my tray a little more funky and one of a kind- which is totally me).  So, I included some extra details like the navy chevron border around the center of the tray as well as a cut out rose and label detail in one of the corners.  In addition, I added some aspects of the ruler printed paper on the outside of each section.

For the sides of the tray with the handles, I traced out the shape of the side first before cutting it out and adhering to the tray. After the modge podge had time to completely dry, I sprayed the entire tray with some craft sealer.  Then after letting the sealer dried (I let it sit overnight), I added scraps of ribbon in to one side of the tray for a finishing touch!


Thursday, March 6, 2014

Cute Card Thursday

This card is fun and ready for spring!  


Whisper White, Summer Starfruit, and Calypso Coral card stock
Starburst Sayings stamp set and framelit dies
Happy Watercolor stamp set
Crisp Cantaloupe, Calypso Coral, and Summer Starfruit ink
Summer Starfruit twine from Sale-a-bration
Blossom Punch
Dimensionals


Monday, March 3, 2014

Two for One Part II

I made a cute banner this weekend for my living room.  This banner is very customizable and easy to use with my favorite craft adhesive- modge podge!

I found thin wood banners at my local craft store, but you can certainly use chipboard or even back the patterned paper with some card stock if the wood banners aren't available to you.  


I started by measuring out paper the size of the banner.  I used Eastern Elegance Designer Series Paper for my pattern.  I'm addicted to the colors in this paper!  After adding a layer of modge podge to my banner base, I adhered the paper and used my palm to smooth out any bubbles.  Then, I trimmed the paper along the base of the banner to cut out the triangle on the bottom.  Set your triangle scraps aside to be used later (hint hint).

Next, I added another layer of modge podge to the top of the banner.  This not only helped to seal the banner, but also created a layer of adhesive for my next step- the floral base for my letters!


I used the Floral Frames collection to cut out my design on Whisper White card stock.  I added these to the center of the banner, smoothed out any bubbles, and added another layer of modge podge.

For the letters, I used Basic Gray card stock and a Cricut machine (using Doodletype letters at 2 inches).  However, the combination of the letter and floral base would work great with My Digital Studio too!  

After letting everything dry, it's ready to string up with some twine.  I also used Natural Chevron ribbon, Smoky Slate Chevron ribbon,  and Coastal Cabana ruffle trim.   


Now, don't forget those scraps of triangle from cutting out the banner; they need a home too!  Utilizing my scraps, I made a cute card!


Half the work was already done with the shapes being cut out (yahoo!).  I simply adhered the triangles to the center of a Coastal Cabana card stock base.  I trimmed the edges of each piece where they overlapped each other to make an even square.  


My sentiment used the You're Lovely stamp set, stamped with Coastal Cabana ink and then filled in with Crushed Curry ink and an aqua painter.  Pearl Basic Jewels were added to the center of each flower and the stems were colored in with an Old Olive Stampin' Write marker.  

Before adhering these to the center of the card with Dimensionals, I created a double bow with white Bakers Twine and used Pool Party seam binding to add a little extra oomph!